


Sport Bike 144 LED Light Kit
For our Sport Bike customers we've put together a solid 144 LED accent lighting foundation that works for just about any brand or model of sport bike.
Every bike is a bit different so we've designed this kit as a starting point to light up the most requested area on sport bikes - inside the fairings, ground efx, rear swing arm area and under the front fairing. Built on our Hi-Intensity Low Profile LED strips, these strips have more LEDs per inch than comparable strips on the market today. More LEDs means more light shining on your bike! Built with two ounce copper PCB, the brightest 5050 LEDs available and 1.2mm of genuine 3M® VHB double sided tape, these LED strips are made tough for motor sports applications. Impressively bright, our Hi-Intensity Low Profile LED strips are thin so they can barely be seen. They produce a smooth, even glow of light. Available in both single color as well as multi-color RGB configurations. Input voltage is 12vdc.
The single color version of this kit can be wired using the included push button switch or, add a wireless on/off (or on/off/dimming/bluetooth) remote. The RGB Multi-Color version requires an LED controller to operate; make your selection from the drop down box above. The RGB LED Controller offered is our popular COMBO RF + BLUETOOTH LED controller. This RGB controller also includes our BRAKE FLASH feature. See the CONFIG TAB for more detail on these switch and controller options offered.
Waterproof Quick Disconnect Connector Option: The answer to future routine maintenance. Add these Quick Disconnect Connectors to your kit. Install inline on your tank wiring, breather, bags, side panels etc. Wherever future maintenance may require access.
Check out the INSTALL tab for more details on placement.
More About the Boogey Lights® Bluetooth Smartphone APP
OTHER ITEMS YOU MAY NEED TO COMPLETE YOUR INSTALL. No two installation scenarios are the same. Not everyone shares the same installation quality goals. Some folks are OK with twisting wires together, others want to solder them. Some folks are OK with running wires where they may be seen or unprotected to save money/time, others want a tidy, clean install without any wires showing. Some folks are OK with mounting their LED strips to whatever surface they can find, others want to take the time necessary to build out appropriate mounting surfaces to provide the best lighting effect on their vehicle. The point is it's not possible to provide all the materials necessary for all installation scenarios and quality goals. Our light kits provide the essential components needed for a high-quality, functioning lighting system. Installation of our light kit to your specific vehicle may however require additional items to make it look and fit the way you want. This is particularly the case with electrical wiring and mounting of LED strips. Before proceeding with your installation we suggest you consider THESE OTHER ITEMS you may need.
Light Kit Configurations
Switching & Controller Options
Single-Color Lighting configurations- Push Button On/Off (default). A simple On/Off push-button switch. Nothing fancy . We typically mount this switch on the left side of the bike just under the tank or a little forward of the seat.
- Wireless RF ON/OFF with Key Fob. A simple wireless ON/OFF remote with 2 handheld remotes. The wireless ON/OFF remote is capable of switching a maximum of 5 amps. This ON/OFF remote measures 2-1/2" x 1-3/4" x 7/8". Single Color LEDs only.
- Wireless RF ON/OFF/DIM/STROB with KEY FOB and Bluetooth. A step up from the ON/OFF wireless remote that gives you the ability to also dim and strob the LEDs. This remote measures 2-1/2" x 1-3/4" x 7/8". 5 amps maximum.
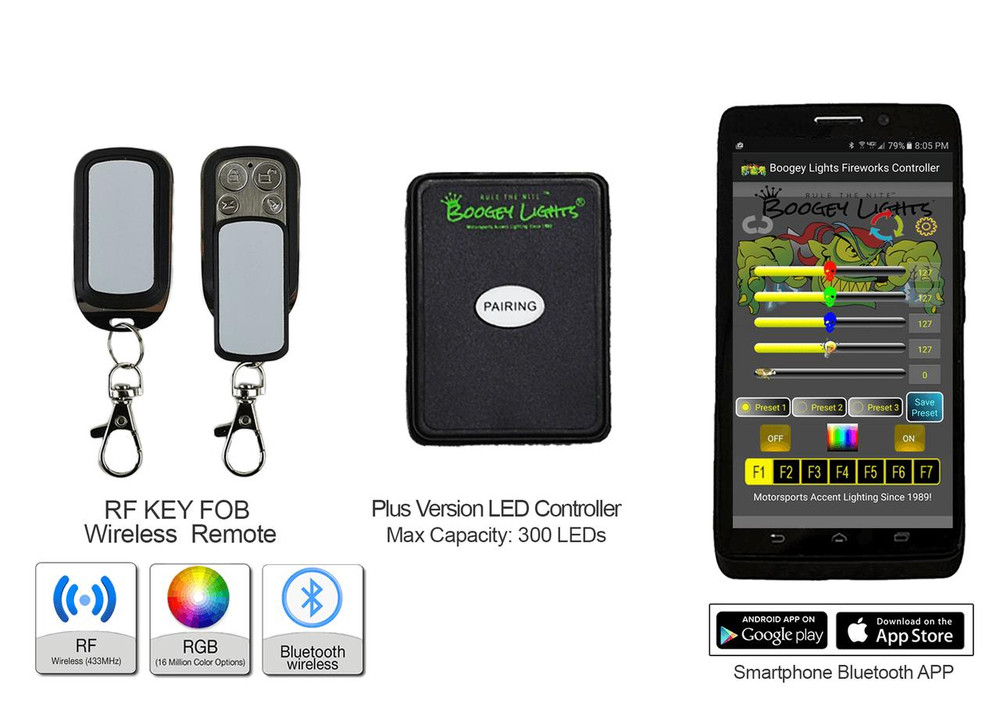
- Wireless RF + Bluetooth RGB LED Controller with KEY FOB style remote and Brake Flash feature (300 LEDs). Maximum capacity is 300 LEDs (5 amps total). This controller is designed to be used with RGB/Multi-Color LEDs. In addition to ON/OFF, this controller provides DIMMING, STROBBING and FLASHING capabilities. Plus, this LED controller will work with your Android® or iOS® Smart phone equipped with Bluetooth 4.0 (max of 16 million color possibilities). With the included RF remote you get all of the functionality of our popular Multi-Function Remote Control that allows you to change between 7 colors and functions of on/off, blending, strobing, breathing, flashing, fading and dimming. You can also use your Bluetooth enabled smart phone to create that custom look with over 16 million different color combinations plus three pre-sets and color rotation programming. See additional details (with video) on the Bluetooth APP and it's capabilities on the BLUETOOTH APP TAB appearing on this product page. It will also work with the included keyfob wireless remote. You get the best of both worlds. This controller is our PLUS SERIES and measures 2-1/2" x 1-3/4" x 7/8".
(see photos of the RF wireless remotes referenced for these controllers in the product image carousel above)
Brake Flash Interface
The RF + Bluetooth Combo LED Controller includes our BRAKE LIGHT INTERFACE. When connected to the 12vdc brake light circuit, it will turn multi-color accent lights to red whenever the brakes are engaged. Its a great motorcycle safety feature to make sure you're seen. You do not have to use the brake flash feature. If you don't want it, simply cap the 12vdc brake flash trigger power input going to the LED controller.
More About the Boogey Lights® Bluetooth Smartphone APP
COMBO RF + BLUETOOTH. Smartphone BLUETOOTH and RF Wireless Combined In ONE Controller. Our RF + BLUETOOTH COMBO controller combines the best of our RF and Bluetooth controllers into one simple to use controller. You can operate this controller with the included RF wireless Key FOBs OR you can use your Bluetooth 4.0 enabled smartphone and our free smartphone APP (Android and IOS). They work interchangeably. With the included Key FOBs you get all of the functionality of our popular Fireworks Multi-Function Remote Control that allows you to change between 7 colors and functions of on/off, blending, strobing, breathing, flashing and fading. You can also use your Bluetooth enabled smartphone to create that custom look with over 16 million different color combinations plus three pre-sets.
Installation Tips
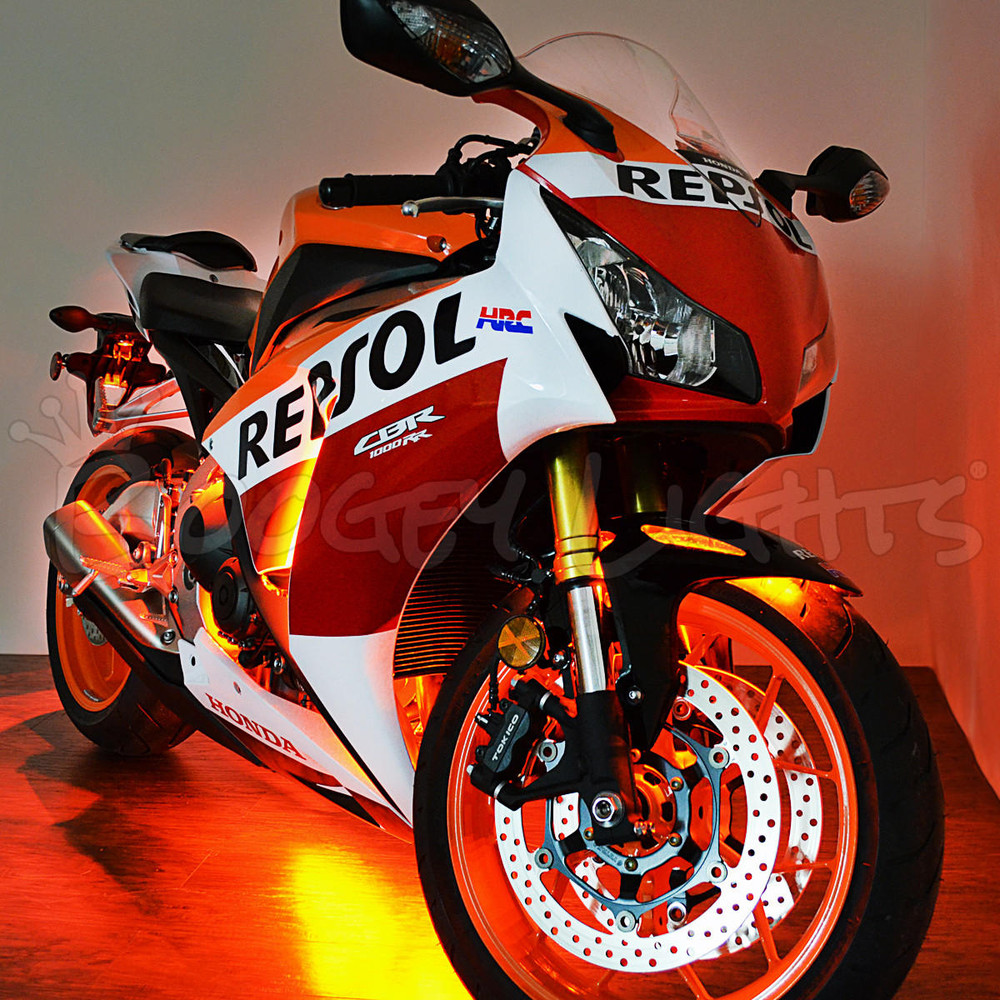
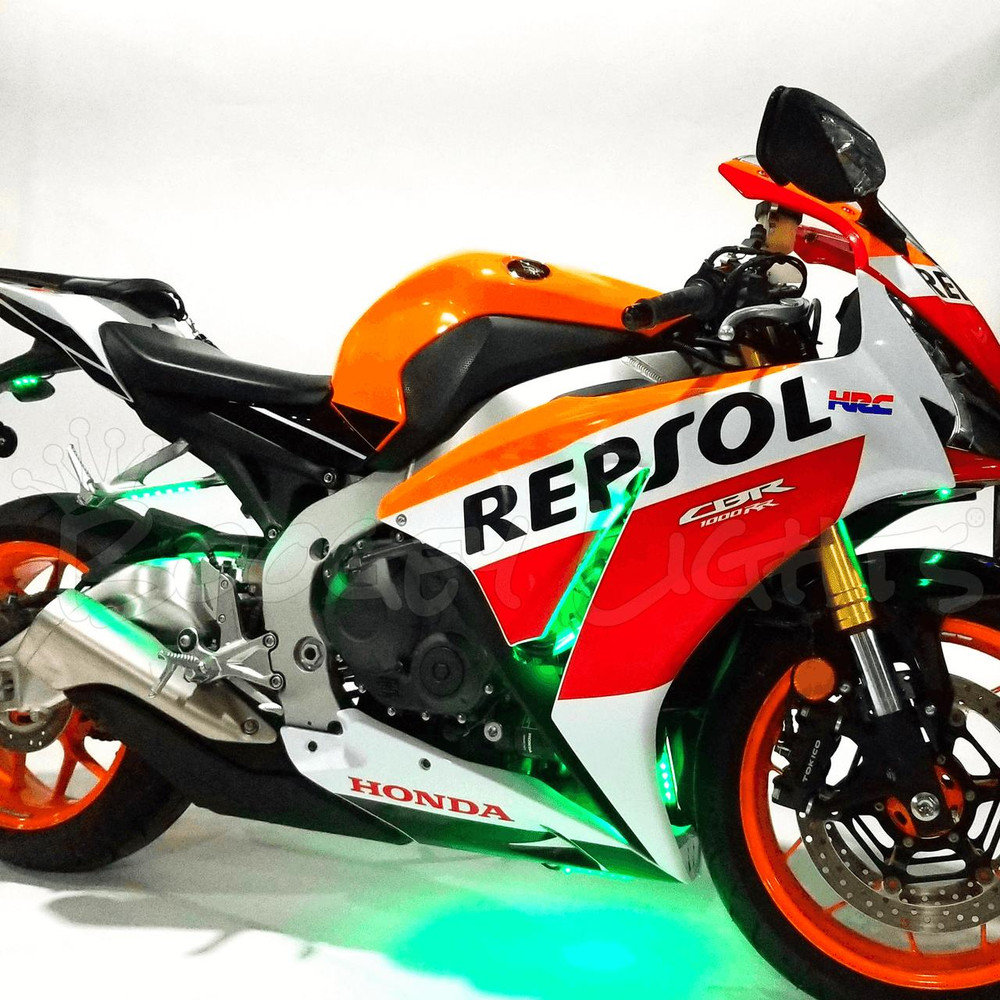
This kit has been designed to light up the areas inside the left fairing, right fairing, bottom fairing, front fairing (top of front wheel area) and under the rear fender. The idea is to install the light strips onto the backside of the fairing so the light pours out and around any vents/openings you have on your bike. Not all bikes and brands will work the same so you'll need to take a look at your bike to see what fits. The kit includes a variety of LED strip lengths to fit pretty much any bike. If necessary, you can also cut the LED strip. Just be sure to cut it where indicated on the strip (between the scissor marks every 3 LED clusters). If cutting the strip, you'll also need to seal the open end with some liquid electrical tape (or similiar substance). You don't want moisture getting into the strip from that cut end. You will need to remove the fairing to do this install. On our Honda Repsol we used the following layout to light around the side vents on each side of the bike, under the bike, under the front fairing and under the rear fender area. We have included some photos of this installation in the product carousel photos. Installation time: 3-5 hours. Your install may be different:
Left Fairing
- 1 – 24 LED strip w/18" power lead
- 1 – 12 LED strip w/18" power lead
- 1 – 18 LED strip w/18" power lead
- 1 – Quick-Disconnect and 48" of power lead cable to make the wire harnesses that runs back to the LED controller. The three LED strips connect to the other end of this harness. When removing the fairing, simply use the quick-disconnect to remove the fairing from the bike with the LEDs attached.
Right Fairing
- 1 – 24 LED strip w/18" power lead
- 1 – 12 LED strip w/18" power lead
- 1 – 18 LED strip w/18" power lead
- 1 – Quick-Disconnect and 48" of power lead cable to make the wire harnesses that runs back to the LED controller. The three LED strips connect to the other end of this harness. When removing the fairing, simply use the quick-disconnect to remove the fairing from the bike with the LEDs attached.
Bottom Fairing
- 2 – 6 LED strips w/24" power lead
- 1 – 3 LED strip w/24" power lead
- 1 – Quick-Disconnect and 48" of power lead cable to make the wire harnesses that runs back to the LED controller. The three LED strips connect to the other end of this harness. When removing the fairing, simply use the quick-disconnect to remove the fairing from the bike with the LEDs attached.
Front Fairing (Area on top of Front Fender)
- 1 – 6 LED strip w/72" power lead (connects back to the controller in the rear compartment)
Rear Fender Area
- 2 – 6 LED strips w/24" power lead
- 1 – 3 LED strip w/24" power lead
We installed the push-button switch on the left side of the bike just beneath the seat. The push-button provides for a quick power-off option that cuts all power going to the LED controller. This way the controller won't drain your battery if your bike is sitting for a long time.
Remember when cutting a strip you will need to seal the end of the LED strip to make a watertight and insulated seal. You can use a dab of silicone or liquid electrical tape if you have some. This kit is easy for a do-it-yourselfer. Includes all you need other than a few hand tools. This kit is fully expandable and allows you to easily add additional strips in the future.
Note: We always recommend dry fitting or temporarily mounting the lights before installation to make sure you get the look you want. The suggestions above are our recommendations. The final mounting location for the lights comes down to your personal preference. So put them where it makes sense to you and for your bike.