


Gold Wing Motorcycle LED Light Kit | 300 LEDs
This LED light kit will light your Gold Wing from front to back. Built on our Hi-Performance LOW PROFILE LED strips, these strips have more LEDs per inch than comparable strips on the market today. More LEDs means more light shining on your bike! Built with two ounce copper PCB, the brightest 5050 LEDs available and 1.2mm of genuine 3M® VHB double sided tape, these LED strips are made tough for motor sports applications. Impressively bright, our Hi-Intensity LED strips are thin so they can barely be seen when attached to your bike. They produce a smooth, even glow of light. The multi-color RGB version of this kit will light up your bike with any of seven different pre-set colors using the RF remote control and 16 million possible color combinations using the Bluetooth APP. You can also animate the LEDs with special effects using the included wireless RF remote control. The multi-color RGB version includes our latest GEN 2 RF + Bluetooth Combo LED controller with BRAKE FLASH feature. Available in both single color and multi-color configurations. Input voltage is 12vdc.
SINGLE COLOR & MULTI-COLOR OPTIONS
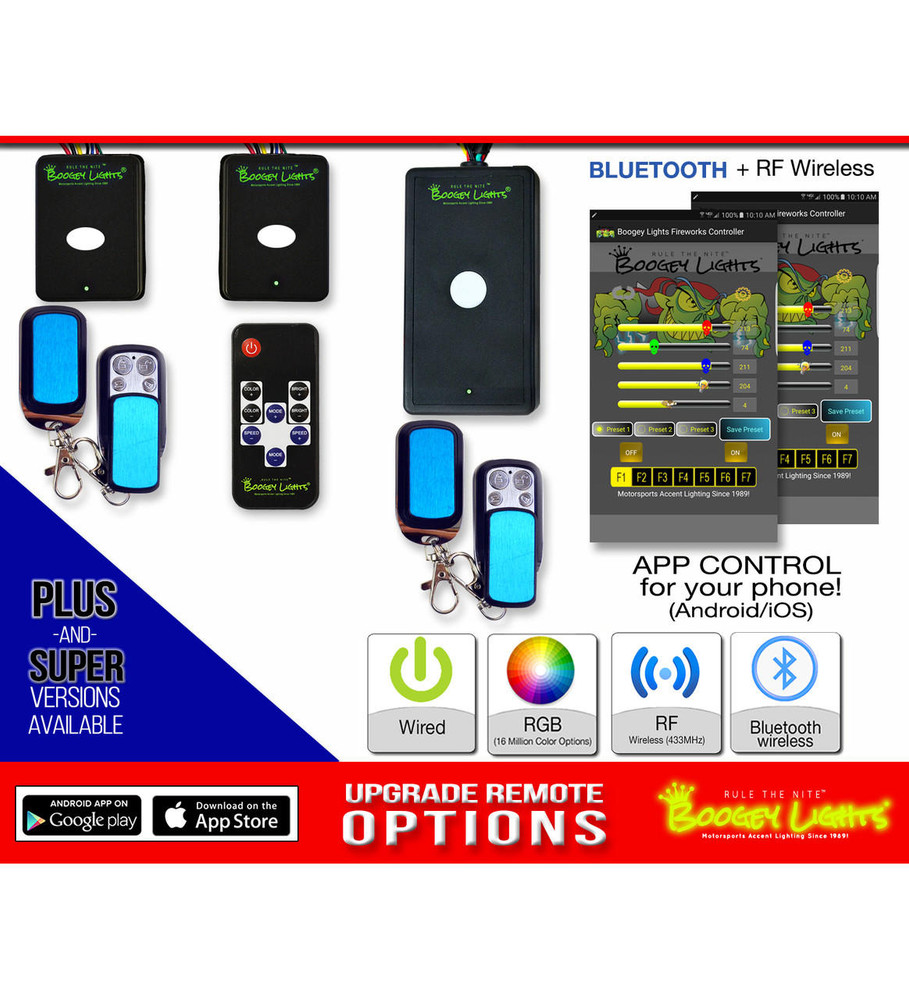
The Single Color version of this kit can be wired using the included push button switch or, add a wireless on/off (or on/off/dimming/bluetooth) remote.
For the RGB Multi-Color version of this kit, the RGBx LED Controllers offered are our GEN 2 (G2) RGBx COMBO RF + BLUETOOTH LED controllers and are offered in two capacity ratings. 300 LEDs (default) and 900 LEDs. These GEN2 RGBx controller also includes our BRAKE FLASH / QUICK-SWITCH feature. Scroll down fo r more detail on these switch and controller option. For more information on the capabilities and features of our GEN 2 LED Controller series, click on the CONTROLLERS tab which includes downloadable wiring and operating instructions.
LED LENGTH CONFIGURATION
6 LEDs - 4.5"
9 LEDs - 6.38"
12 LEDs - 8.38"
15 LEDs - 10.25"
18 LEDs - 12.25"
21 LEDs - 15.25"
24 LEDs - 16.13"
27 LEDs - 18.13"
30 LEDs - 20"
*When cutting, be sure to seal the end with liquid electrical tape, Lexel or similar substance to keep from shorting out when wet.
USING THE BRAKE FLASH FEATURE
The Brake Flash feature is available on the GEN 2 PLUS LED Controller (the 300 LED capacity controller). When connected to the 12vdc brake light circuit, it will turn multi-color accent lights to red whenever the brakes are engaged. Its a great motorcycle safety feature to make sure you're seen. You do not have to use the brake flash feature. If you don't want it, simply cap the 12vdc brake flash trigger power input going to the LED controller. There is a similiar feature called the QUICK-SWITCH on the GEN 2 Super LED Controller (see below).
USING THE QUICK-SWITCH FEATURE
The Quick Switch feature is available on our GEN2 SUPER, HD SINGLE ZONE and HD DUAL ZONE LED Controllers. Whatever color LED you have connected to the GREY output wire of the GEN2 Controller is the color that will display when the Quick Switch is triggered with 12vdc +. The most common use for this configuration is with commercial vehicles who want to be able to instantly turn off whatever color they're running and turn on a DOT compliant AMBER which is on our RGBA LED strips. For these installations, the yellow trigger wire is connected to a toggle switch or other wireless switch that activates the AMBER leds. This feature however can be used with other vehicles too such as RVs and Golf Carts. In these cases that yellow trigger wire is connected to a toggle switch that turns on the White or Amber diodes. When the Quick Switch trigger wire is not energized, the LED controller operates the RGBxx diodes normally.
QUICK-DISCONNECT CONNECTOR OPTION
The answer to future routine maintenance. Add these Quick Disconnect Connectors to your kit. Install inline on your tank wiring, breather, bags, side panels etc. Wherever future maintenance may require access.
NOTE ON UV/PURPLE SINGLE COLOR LEDS
True purple LED's are actually ultra-violet (UV). They produce a soft, pleasant purple glow particularly when used on or near shiney reflective surfaces (e.g. chrome motorcycle engines). The color however is not a real bright effect like you'll get with any of the other LED single colors. If you want a subtle, purple glow that looks great, then the UV/LED's may well be for you. If however you want the brightest lights possible, you will not be happy with UV/Purple. The alternative to UV/Purple is MAGENTA (some call it a 'hot purple') which looks similiar but has a brighter, pinkish tint. Magenta is created by mixing equal parts BLUE + RED which can be done using RGB plus LED Controller. We also offer this Magenta / Hot Purple color mix in our Single Color LED options.
OTHER ITEMS YOU MAY NEED
No two installation scenarios are the same. Not everyone shares the same installation quality goals. Some folks are OK with twisting wires together, others want to solder them. Some folks are OK with running wires where they may be seen or unprotected to save money/time, others want a tidy, clean install without any wires showing. Some folks are OK with mounting their LED strips to whatever surface they can find, others want to take the time necessary to build out appropriate mounting surfaces to provide the best lighting effect on their vehicle. The point is it's not possible to provide all the materials necessary for all installation scenarios and quality goals. Our light kits provide the essential components needed for a high-quality, functioning lighting system. Installation of our light kit to your specific vehicle may however require additional items to make it look and fit the way you want. This is particularly the case with electrical wiring and mounting of LED strips. Before proceeding with your installation we suggest you consider THESE OTHER ITEMS you may need.
NOTE: Our PLUS series LED Controller can power up to 300 LEDs. If you're going to be adding additional LEDs to your system, be sure to select the SUPER LED Controller which can power up to 900 LEDs.
Typical Installation
The typical installation locations based on our dealer feedback is shown below. Note you may have some unusable segments left over if you go by this layout depending upon placement. This is merely a suggested layout. It's your bike so light it up as you wish. We always suggest temporarily laying out your lights (aka 'dry fitting') before you permanently attach them to your bike. This kit works for 2001-Present GL1800 and 2013+ F6B. Keep in mind that the maximum number of LEDs the PLUS controller can power is 300. If you decide to add more lights to your configuration, be sure to upgrade to the SUPER controller which has a max capacity of 900 LEDs. Note that the above photo has a 'ring of fire' led light affixed to the front wheel which is not a Boogey Lights product. While this kit is designed for the DIYer, there is some minimum skill level required to do the installation. For example, you need to have a basic understanding of 12vdc power and related wiring. You'll also need to be able to remove (and re-install) the plastics as well as safely mount the LED strips and route the related wires on the bike so they don't interfere with other functions. We also recommend that you have an adequate place available to do the installation and not be rushed.
Here's the suggested locations:
- Front Wheel - Use one segment inside the front fender on each side above the curve.
- Fairing - Use one LED segment under the fairing above the front fender.
- Windshield Garnish - Use an LED segment above the slit for 2001-2010 and a shorter one on 2011+ and F6B models.
- Front Air Vents - Use one LED segment each side. Fish wire from vent near knee. Works for the 2001-2010 only.
- Fairing above cylinder heads - Use one LED segment each side under the fairing directly above the cylinders.
- Radiator Grills - Use one LED segment each side. Install on the center section shining at the radiators. Use an LED segment on top and on bottom. For F6B models there you can also fit an LED segment to mount on the middle.
- Boomerang Frame - Use an LED segment each side. Install on the plastic shelter above and shine down onto the frame.
- Side Cover - Use an LED segment each side. Install behind side cover opening.
- Top Trunk - Use an LED segment in the recess in front of each side bag release levers and in the release lever well for the top lid.
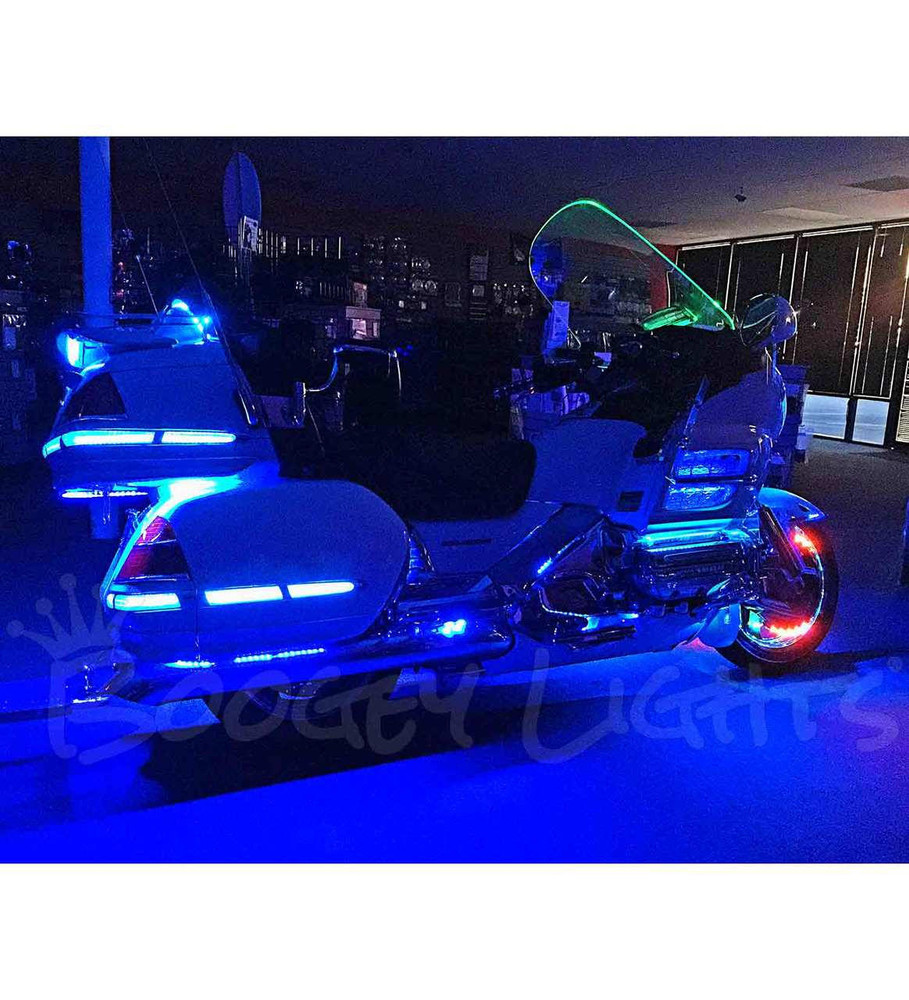
- OPTIONAL - Some will create a windshield glow by adding a full strip at the base of the windshield shining straight into the edge. Works with clear screens only though. Check out the Wing shown to see what a windshield glow looks like.
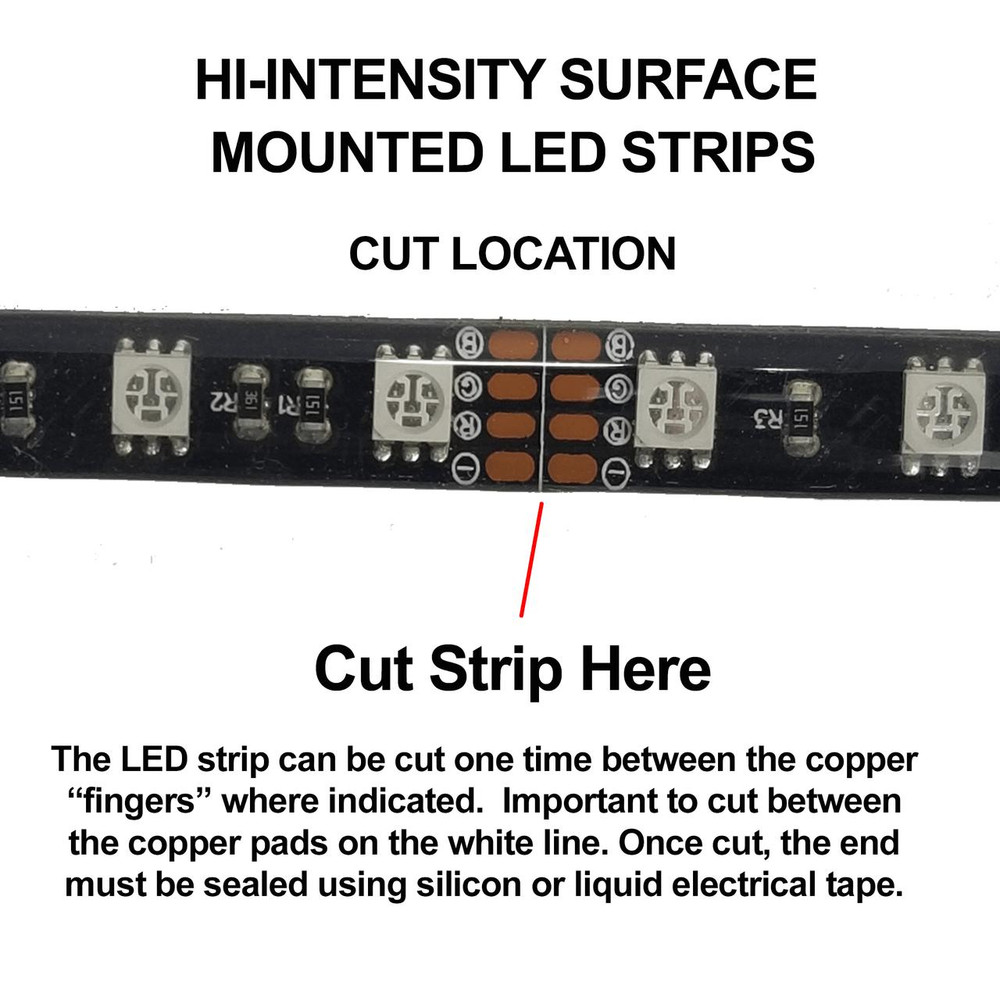
The above is a suggested layout - install the strips to your liking. While each LED strip power lead needs to connect to the LED controller, you can run feeder wire and connect multiple strips together. For example, the strips on the front of the bike can connect together to one feeder wire if so desired to make the installation easier and then run that feeder wire back to the LED controller. You may need to purchase additional 4 conductor cable in this case which we offer for sale or can be purchased at most big box home improvement stores. Just be sure to purchase 20awg or heavier wire for the feeder cable. Note: It is important to remember that the strips can be cut one time in groups of 3 LEDs. That means after you cut it you will now have one of the following configurations:
- 3 LED strip & 27 LED strip
- 6 LED strip & 24 LED strip
- 9 LED strip & 21 LED strip
- 12 LED strip & 18 LED strip
- 15 LED strip & 15 LED strip
These lights will also work well on a Can-Am Spyder. Order some extra strips until you get the coverage you want.
NOTE: We always recommend dry fitting or temporarily mounting the lights before installation to make sure you get the look you want. The suggestions above are our recommendations. The final mounting location for the lights comes down to your personal preference. So put them where it makes sense to you and for your bike.
Sealed, Flexible Strips
The LEDs on our HI-INTENSITY strips are sealed against the elements. They are heat resistant, waterproof and easily cleaned for a lifetime of maintenance free operation. The soft, gel-like strips provide maximum flexibility and a clean and sleek appearance. Their low profile design makes them virtually invisible when placed on the bottom of your tank and their wide viewing angle floods your bike with light.
Each strip has a 36" power lead which is hard wired to each end of the strip. If you need to cut a strip, be sure to cut where indicated on the strip (ever 3 LEDs) and make sure you seal the cut end with liquid electrical tape or something similar to keep water from shorting out the strip. A wrong cut in the wrong place or not sealing the cut end properly will void your warranty. Call us if you are unsure where to make your cut.
Waterproof Black Quick Connector Options
The answer to future routine maintenance. Add these Waterproof Black Quick Connectors to your kit. Install inline on your tank wiring, breather, bags, side panels etc. Wherever future maintenance may require access.